

Building a Porch Roof
Building a porch roof or screened in porch roof over an existing deck or patio can be fairly straight forward or very complex depending on the type of roof you choose. We show you how two different roofs are constructed so you will know what is involved.
Most porch roofs are typically shed roofs or variations of hip roofs.
The biggest challenge is determining the rise and run and cutting a “bird’s mouth” at the outer end of the rafters that rests on the header.
Considerations Before Starting
Here’s a few things to consider prior to building your roof:
Determine the rise and run of your home’s roof. Most porch roofs should be the same as your home’s roof. Use our handy rise and run guide to help determine yours.
Determine the type of roofing material you want to use. This is in part dictated by the rise and run. If you have a unit rise of 4 or more you can use almost any type of roof covering (asphalt shingles, tile, slate, cedar shakes, etc.) However, if your roof is 3 or less, you are limited to asphalt shingles. Consider either raising your porch roof or lowering the ceiling (8 foot is normal) to accommodate a higher unit rise to give you more options.
Determine your electrical requirements for lights, fans, and receptacles. Why would you put a receptacle in your ceiling? Installing a receptacle in the ceiling will alleviate having to run extension cords!
Note the placement of windows above your new porch roof. You must leave a minimum of at least 3 inches below the window sills.
Basic Steps for Building A Porch Roof
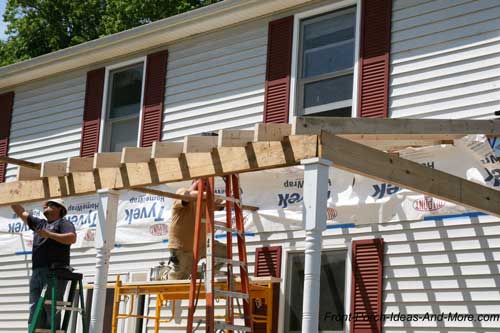
The following steps to building a porch roof like the one pictured above (shed or hip-type roof) will give you a general idea of how it’s done and what’s involved. We cannot cover every building method as they can vary widely from contractor to contractor.
We also do not cover every aspect in detail but will give you sufficient information you can use to assess your own abilities or to be able to ask the right questions of a contractor.
Do not use the following information as a “how-to” guide; it is forinformation only.
We highly recommend that if you are not 100% confident you can do the work safely and to code that you consult with a professional licensed contractor.
STEP 1: Know Codes and Permit Requirements
Know and comply with your local building codes regarding roof construction in your area. In addition, pull the proper permits as required. Many people, especially do-it-yourselfers, do not like to get permits due to time and costs. However, doing so ensures that your work is to code in order to protect you, your family, and your property. In addition, many insurance companies may not pay claims in situations where work was not to code. Words to the wise!
STEP 2: Determine Rise and Run
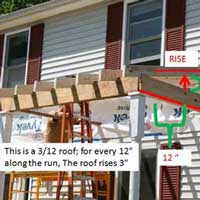 When building a porch roof you have to determine the rise and run of your porch roof. Normally, you will want to replicate the same rise and run you have on the main roof of your home. Sometimes this is not feasible due to window placement but you want to get as close to it as possible.
Next, determine the location on your wall where you will attach the rafter plate to get the proper rise and run. Our basic rafter length calculator will give you a general idea of how long your rafters must be for a given rise and run.
STEP 3: Mark Rafter Plate Location and Remove Siding (if applicable)
 Now that you know the rise and run, you know where to place the rafter plate on your wall. Make sure it is at least 3 inches below any windows allowing for the thickness of your roofing materials (at least 2 inches).
Snap a horizontal chalk line at this point a minimum of the length of the flooring below. This will be your “upper” line measurement for the rafter plate.
Measure down from this line the width of your rafter plate. Usually, it is a 2×6 board, so in this case, measure down approximately 6 inches. Snap a horizontal line at the mark – it is your “lower” rafter plate line. These two lines represent the location of your rafter plate.
Carefully remove the siding contained within those lines to expose the wall studs or other supporting material. Disregard if placing rafter plate on brick, etc.
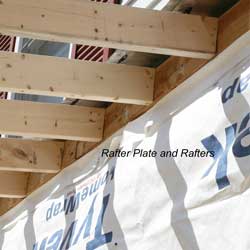
STEP 4: Install the Rafter Plate
Fasten the rafter plate to the wall studs with lag screws. However, this may not always be the case. Sometimes you may run into an I-beam or truss situation. A different fastening system will need to be used in those cases.
STEP 5: Locate Column Positions
Snap a chalk line on top of your porch or deck on the outside line of the beam that supports your flooring. You’ll have to locate the beam underneath (usually visible from each end).
You will locate, as a minimum, one column on each end at least 3 inches in from the corners and one every 6 to 10 feet apart. Consider openings for stairs when determining the actual placement of columns You will typically need one on each side of the stairs. As a rule of thumb, try to use an odd number of columns; it’s more aesthetically pleasing to the eye.
Check with your codes department to ensure you set the right amount based on the width and type of roof being constructed when building a porch roof.
NOTE: Everything outlined above pertains to decks and patios also. However, you may have to make a few adjustments:
Decks: You still need to attach columns to the beam under your deck. Depending on how your deck was constructed you may need to reinforce the beam to carry the column and roof. Check local code requirements.
Patios: For patios, attached your column anchors to the concrete with the appropriate fasteners. There are several different types on the market and your local home supply store should be able to assist. If you have other than a poured concrete patio, you should review our porch foundation section.
STEP 6: Erect Columns
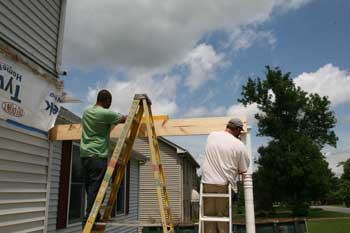
Place a column in the anchor on one end of the decking, plumb, and secure properly. You may need to brace the column while you continue.
On this building a porch roof project, a beam is placed against the ledger board and fastened to the top of the end column. Plumb and square the column. Brace as necessary. (This board may not be required in your situation. If you don’t have a ledger board, you will need to create blocking to accept the beam. Use the same procedure for installing a rafter board above).
Repeat this on the other end as well.
I’ve seen and done this several different ways. One is to anchor and brace all of the columns. Another is to anchor and brace the outside columns and then anchor the header on each end. It depends on the length and height of your roof.
The main goal is to make sure the columns are square to the house and the floor.
On this particular project, we reused the old header and due to it’s length, installed it on columns in sections as depicted below.
STEP 7: Set the Header
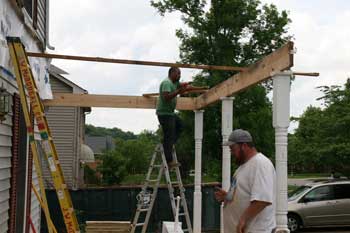
You will normally build a header out of 2×6 or 2×8 planks. Sandwich a piece of 1/2 inch plywood in between the boards and nail together. When building a porch roof, the header carries most of the weight of the roof. Ensure that it is substantial. Place the header on top of the columns and secure by toe nailing. Continue this process the length of the porch.
STEP 8: Cut and Install Rafters
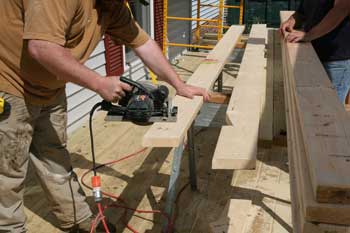
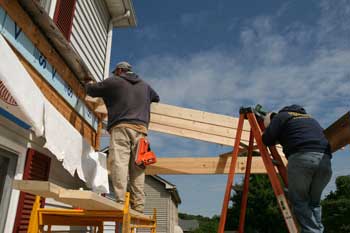
Before you install the rafters you will have to make special cuts called “tails” and “bird mouths”. These notches are designed to fit against the rafter board and over the header. You will need a rafter square in order to lay out the cuts on the boards. Building a porch roof requires accurate measurements.
Although not difficult, laying out the cuts to fit precisely requires practice and skill. We provide a link below to information regarding how to calculate and make these special cuts.
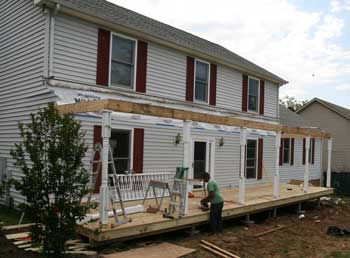
STEP 9: Install Supports
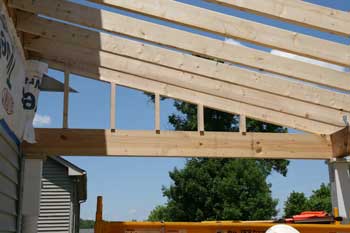
For this building a porch roof project, we needed to provide nailing support for siding and to enclose the ends. We did this by installing jack studs and plywood on each end of the roof.
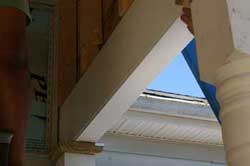
STEP 10: Install Fascia Board
A fascia board is installed on the rafter tails. Gutters will be attached to this later. Although we did not use them on this porch roof, you could install “lookouts” that attach to the end of the rafter tail and the header. These provide a flat surface on which to nail the soffits.
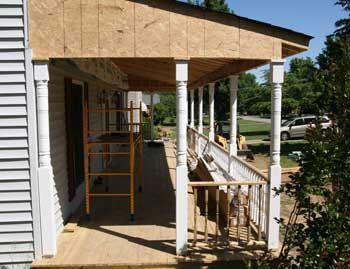
STEP 11: Apply Sheathing and Roofing Materials
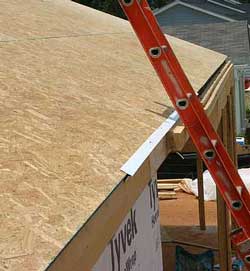

Sheathing (1/2 inch plywood or OSB) is nailed to the rafters. Once completed, roofing paper will be installed. Then attach drip edge over the roofing paper. When building a porch roof, asphalt shingles (or other roofing material) are then attached over the roofing paper and drip edge.
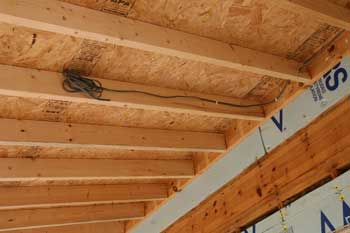
As you can see in the picture above, now is the time to install your electrical wiringfor lights, fans, and receptacles according to your plan.
Planning to install outdoor ceiling fans now or in the future. Now’s the time to add additional blocking to support the fans!
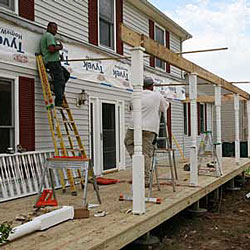
STEP 12: Wrap Exposed Wood
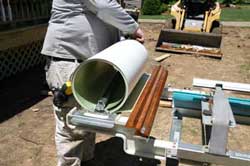
Aluminum flashing is used to wrap the exposed wood on the beams and sides. A special machine is needed to bend the flashing to fit over the wood. It really helps to have experience prior to attempting this to ensure it looks good on your home.

